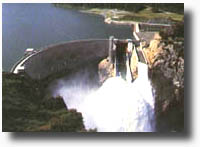
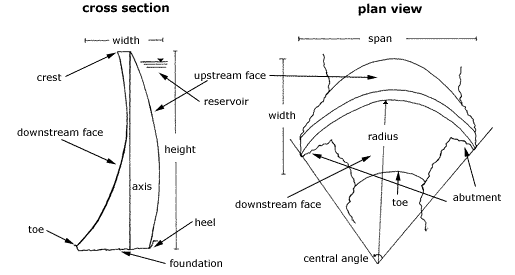
Arch dams are usually made of concrete and are
very suitable for narrow gorges with strong abutments. The gorge is often in
the shape of a V; less often it is a U-shape. Arch dams use much less
conrete than gravity dams. The best design is a double-curved arch. Arch
dams are generally classified as thin, medium, and thick, depending on the
ratio of the width of the base (b) to the height (h): thin: b/h < 0.2
medium: 0.2 < b/h < 0.3 thick: b/h > 0.3
There is no generalization for the ratio between the width at the crest (c) and
the width at the base (b). Historically, c/b has even been 1 -- the same
thickness at the base and crest. Often, c/b is equal to 0.5.
If you only know the height of an arch dam, use the following equations to find
the other dimensions for a simulation:
crest width = height * 0.2
base width = height * 0.3
|
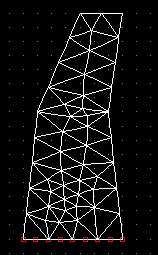 |
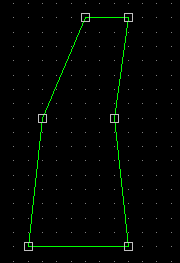
You'll notice that the dam is attached to the foundation in the pictures
at the top.
You'll have to tell the computer where your dam is attached to the foundation.
In the picture to the left, the model dam is attached to the ground along the bottom
of the dam -- that's what the red dots mean.
 A civil engineer calls the points where
a structure is attached to something else its fixity. A civil engineer calls the points where
a structure is attached to something else its fixity. |